
Before you start recording, you need to have a microphone connected to your computer. Many computers will have an internal microphone, but if you don’t have one (or if the quality isn’t good enough), you might need to plug in an external microphone.
2. On the SLIDE SHOW tab, click Record Slide Show.

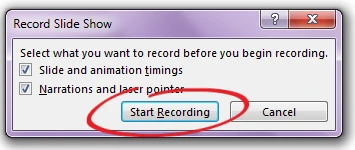
3. In the popup, check that both options are selected, then click Start Recording.
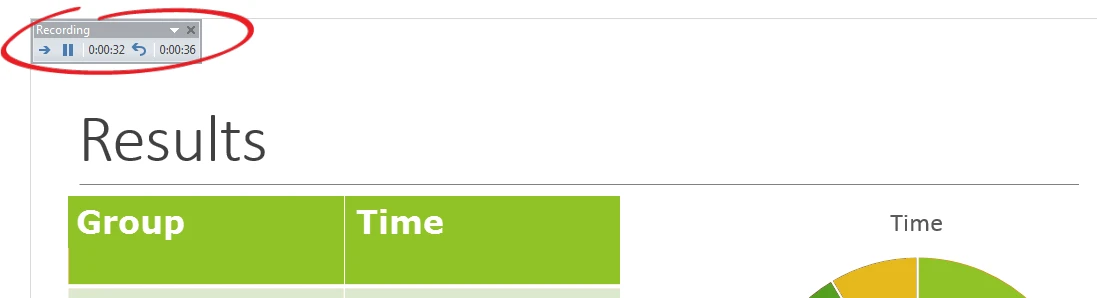
Your presentation starts, and you are immediately recording. The recording panel appears at the top left of the presentation.
4. Run through your presentation as usual, narrating it as you go. Make sure you speak loudly enough for the microphone to record your voice.
5. When you’ve finished recording audio for the first slide, click the arrow in the recording panel to continue to the next slide.
6. Keep progressing through the rest of your slides in the same way. When you’re finished recording, click X on the recording panel.
Your recording is saved and attached to your presentation.
Once you’ve made your recording, you can go back and listen to it. If you want to make any changes, you can re-record the whole presentation or individual slides.
To review multiple slides along with their audio, go to the SLIDE SHOW tab and click From Beginning to view all slides, or From Current Slide to view slides from the current slide onwards.

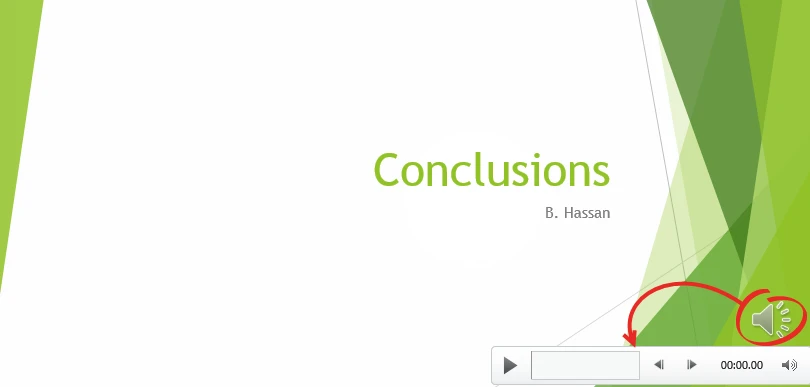
To review the audio for an individual slide, navigate to the slide and click or hover over the speaker icon in the bottom right of the slide. A toolbar appears, where you can play the recording for that slide.
You can re-record the audio for your whole section of the presentation, or for individual slides. Note that any slides you don’t re-record audio for will keep their original audio until you record over it.
To re-record the audio for your entire section of the presentation, navigate to the first slide, then go to the SLIDE SHOWtab and click Record Slide Show. Your recording starts automatically, and will replace the original recording you made.
Use the arrow in the recording panel to navigate through your slides.
When you’re done, click X in the recording panel. Note that if you stop recording before the end of your presentation, the slides you haven’t re-recorded will keep their original audio.
To re-record the audio for a single slide, go to that slide in the presentation, then go to the SLIDE SHOW tab and click Record Slide Show. Your recording starts automatically, and will replace the audio for the current slide.
When you’re finished recording the audio for the slide, click X on the recording panel.
Note that if you continue to the next slide during your recording, either by clicking the arrow on the recording panel, or progressing through the slide show, you’ll be recording over the audio for that slide, as well.
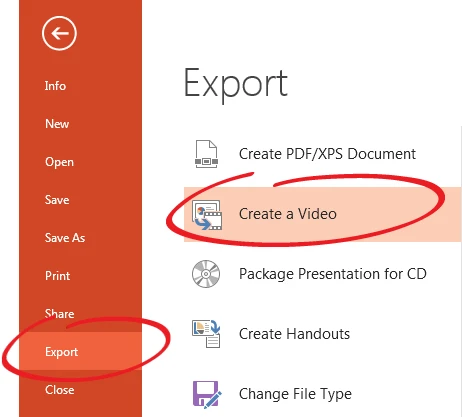
Once you’re happy with your recording, you can export your presentation as a video. You need to do this before you can upload it to YouTube.
2. In the first dropdown list, select Internet & DVD. In the second dropdown list, choose Use Recorded Timings and Narrations.
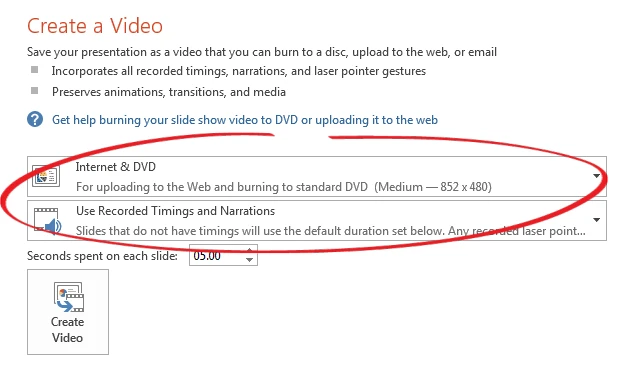
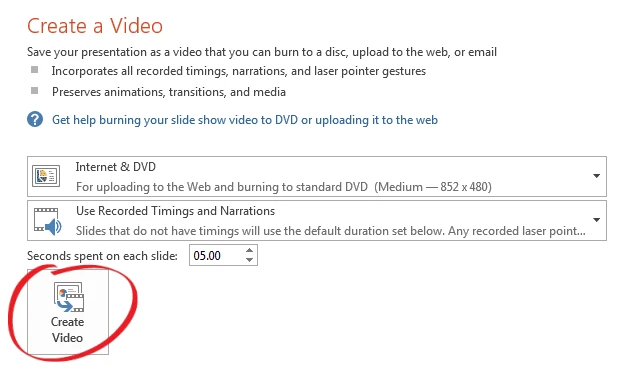
3. Click Create Video.
4. Choose a name for the video of your presentation and where you’d like to save it.
5. When you’re happy with the file name and location, click Save.
The video is created. You can see the status at the bottom of your presentation.
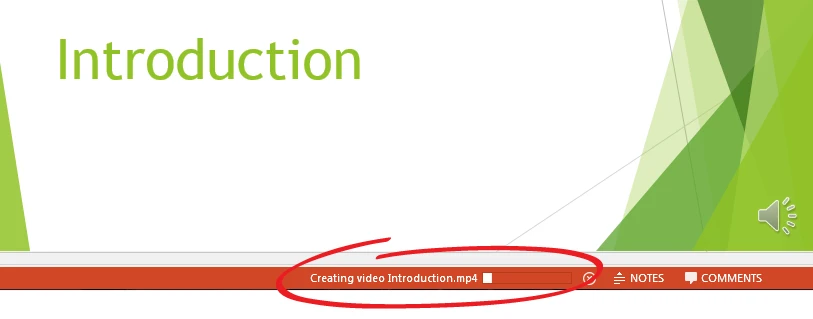
When the status bar disappears, your video has been created and saved in your chosen location.
Your video is now ready to share.